Retrofitting The Polymetrics Faceter..
The Polymetrics "Scintillator" model is quite complex, with a unique cam-and-dial indicator angle readout. Interestingly, perhaps because it was quite a new machine, it was in accurate calibration. If you do not feel comfortable dismantling the machine STOP NOW. The manufacturer does offer a digital readout. Otherwise, we proceed as with many of the other shaft machines.

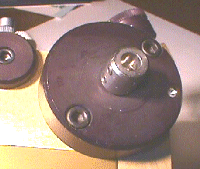
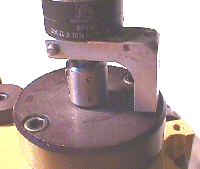
The machine is disassembled and a 0.252 hole bored in the angle shaft to accept the potentiometer shaft. In this machine's design, the shaft is flush to a ball bearing, so there is no room for a setscrew. But the bearing cover already has a clearance hole for a 1/4" shaft. In all cases in these upgrades, we try to minimize the machine modification as much as we can- the less drilling and tapping, the better....Because sometimes people sell machines with or without all the attachments, and there is no need to annoy the owners and manufacturers with huge holes bored all over it, etc.. So all these upgrades are removeable with minimum damage to the machine. In this case, a precision 1/4" drill rod is epoxied into the .252 bore in the angle shaft, so that it extends the shaft beyond the bearing cover. The pot requires almost no torque. A 1/4" Shaft coupling is locked onto the protruding shaft.

A mounting clamp is made to attach the potentiometer to the machine's bearing cover rather than the frame. In this way, only the bearing cover is reworked, and not the machine's frame. If awful mistakes are made, the bearing cover can be replaced.

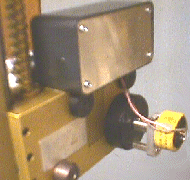
I finally found a bigger box with more room for the 9-volt battery. Radio Shack has them...Ugly, but a better size.

The box is wired as with the other units.
We have assembled the potentiometer so its electrical and mechanical zero at the the machine's Zero Position (Table polishing position)
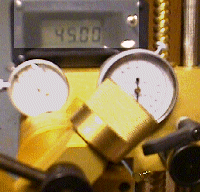
, so now all we have to do is turn it on, and setting the angle exactly at 90 degrees with an accurate protractor or square (Never the one on the machine), turn the trimpot until it reads exactly 90 degrees.
Be sure to check several other positions such as 45 and 60o with an accurate triangle. Now, if you intend to keep the original protractor, set it to read the same as the accurate squares and triangles.
For a very accurate calibration method, Click Here.
VIEW SCHEMATIC
To the main Gemcutting Page.


Click Here.
To the main Gemcutting Page.